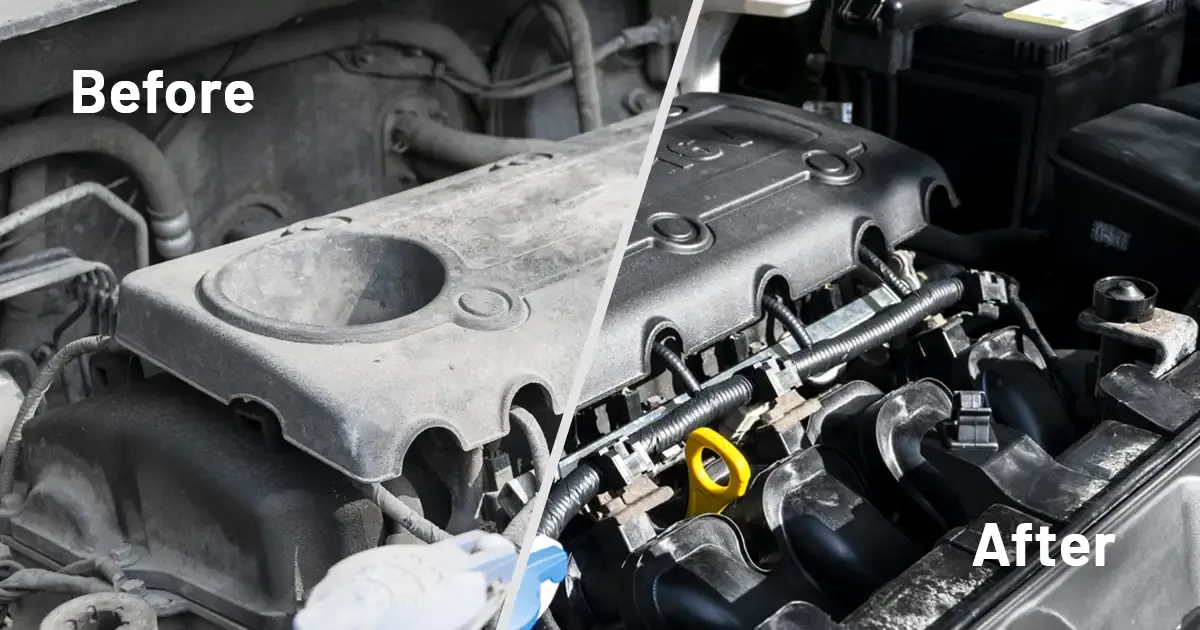
In the world of automotive care, the engine bay is often the unsung hero․ While shiny exteriors and polished interiors grab the spotlight, the engine bay remains hidden, harboring the very heart of your vehicle․ However, neglecting to clean this crucial area can lead to a myriad of issues, from performance problems to aesthetic concerns․ In this article, we delve into the art and science of engine bay cleaning, illuminating its importance and guiding you through an effective cleaning process․
Why Clean the Engine Bay?
Cleaning the engine bay is not just about making your car look good; it serves several practical purposes:
- Preventing Corrosion: Dirt, grease, and grime can trap moisture, leading to rust and corrosion on critical components․
- Enhancing Performance: A clean engine can operate more efficiently․ Dust and debris can clog air filters and interfere with cooling systems․
- Safety First: Accumulated grease can become a fire hazard․ Keeping the engine bay clean decreases this risk․
- Ease of Inspection: A clean engine bay makes it easier to spot leaks, wear, and other potential issues before they develop into costly repairs․
What You Need for Engine Bay Cleaning
Before you begin, gather the necessary supplies․ Here’s a checklist to ensure you’re fully prepared:
- Protective Gear: Safety goggles and gloves to protect yourself from chemicals and debris․
- Degreaser: A good automotive degreaser will break down grease and grime effectively․
- Brushes: Soft-bristled brushes for scrubbing tight spots and a stiff brush for tougher areas․
- Microfiber Cloths: For drying and detailing your engine components․
- Water Source: A garden hose or pressure washer, though be cautious with the latter․
- Plastic Bags: To cover sensitive components like the battery, air intake, and electrical connections․
Step-by-Step Guide to Cleaning Your Engine Bay
Now that you have your supplies ready, let’s walk through the cleaning process․
Step 1: Preparation
Start by ensuring the engine is cool to the touch․ This is crucial for safety and to avoid damaging components․ Disconnect the battery, covering terminals with plastic bags to prevent moisture intrusion․
Step 2: Initial Rinse
Using a low-pressure hose or a pressure washer, lightly rinse the engine bay to remove loose debris․ Be careful around sensitive areas to prevent water from entering electrical components․
Step 3: Apply Degreaser
Spray the degreaser generously over all greasy surfaces, allowing it to sit for several minutes․ This will help break down the grime․ For particularly dirty areas, agitate the degreaser with a brush to ensure thorough coverage․
Step 4: Scrub Away Grime
Using your brushes, scrub the engine bay surfaces, paying special attention to nooks and crannies where dirt tends to accumulate․ Rinse the brushes frequently to avoid spreading grease around․
Step 5: Rinse Thoroughly
Once you’ve scrubbed the entire area, rinse everything off thoroughly with your hose or pressure washer․ Ensure that no degreaser or dirt is left behind․ This step is crucial to prevent any residue from causing damage․
Step 6: Drying
After rinsing, use microfiber cloths to dry the engine bay․ This will help prevent water spots and corrosion․ Make sure to get into hard-to-reach areas, ensuring everything is dried properly․
Step 7: Final Touches
Once dry, you can apply a protectant to rubber and plastic components to restore their luster and provide some protection against UV rays and dirt buildup․
Post-Cleaning Maintenance
After the initial deep clean, maintaining a clean engine bay becomes much easier․ Here are a few tips:
- Regular Inspections: Check your engine bay every few months for any signs of leaks or dirt accumulation․
- Spot Cleaning: If you notice any grease or dirt spots, address them immediately with a quick wipe-down using a degreaser․
- Keep It Covered: If you park outside, consider using a car cover to minimize dirt and debris accumulation․
Common Mistakes to Avoid
While cleaning your engine bay, be mindful of these common pitfalls:
- Using High Pressure: High-pressure washing can force water into electrical connections, causing damage․
- Neglecting to Protect Components: Always cover sensitive components like the alternator and exposed wiring to avoid damage․
- Using Harsh Chemicals: Some household cleaners can damage engine components․ Stick to automotive-specific products․
Cleaning your engine bay is more than just a cosmetic choice; it’s a necessary part of vehicle maintenance that can lead to enhanced performance, longevity, and safety․ By following these steps and incorporating regular cleaning into your automotive care routine, you’ll ensure that your engine runs smoothly while making it easier to diagnose potential issues․ So roll up your sleeves, gather your supplies, and give your engine the attention it deserves!

